Techniques for Faux Finishing
Whether you choose sponge painting, marbelizing, crackling, chalk painting, texturizing, stenciling, ragging or a combination of these refinishing methods, your end result will be a custom piece of your own for pennies compared to the furniture or home decor accessories in gift and furnishing shops.
Your choice of technique will reward you with a uniquely designed room or upscaled accent piece in whatever style you prefer, from shabby chic to brilliantly midcentury or new modern.
Faux Finishes and Decorative Painting Tips
Sponge painting
Sponge painting is great because it is easy, fast, requires little paint and materials, and did I mention it was easy? It can be used on walls, furniture, and accessories, and can give instant facelift to dull objects.
Don't let anyone convince you that you have to go buy an expensive sea sponge to do this. I've used plastic grocery bags, cloth diapers, even old clothing…(Ok, now it's called ragging, same technique, more subtle look.) But you can use a plain old kitchen sponge, and here's the secret….tear away all the hard edges of the sponge, even tear chunks from the center to give it an irregular appearance.
Now choose your paint, and sponge! Remember to sponge sparingly at first, you can always add more later. Also, dab the paint off on your plate first, you only need a little paint on the sponge, or it will be too gloppy. Practice first on a paper bag, and remember to change the direction of your hand occasionally, the idea is not to get a pattern going.
Try combining sponge painting with stenciling or decorative painting, tape off a border and use it just there, you can even sponge paint over glassware with the new glass paints available at your craft store.
Marbelizing
There is a very simple technique to marbleizing that is popular in the home decorating world today, and you won't believe how easy it is until you try it.
Simply choose two to four colors of paint within the same color scheme, one light, one medium, one dark. Using a regular paintbrush, dip the brush into all the colors. Now simply pounce the paintbrush over the surface to get a mottled effect.
It might help to keep a picture of a piece of marble nearby to refer to. Use the different colors to add shading, or tone down an area you think is too bright.
When finished with the surface, take a small artists liner brush, dip it into either the lightest or darkest color you used, (thin with a little water, if necessary) and paint veins by dragging the brush over the surface, wiggling it as you go. Don't go overboard on the veining. Remember also to bring the veins over the edges for a realistic finish.
I think sealing it with a gloss clearcoat or polyurethane gives the most authentic look of polished marble.
Crackle Finishes
Crackling is very popular as aged finishes have become so much a part of showcasing warmth and history in our homes. It can be done without purchasing expensive crackling kits. Shabby chic techniques capitalize on scuffing and crackling to add charm to painted furniture.
Crackled finishes are a simple chemical reaction. All you need are two colors of latex paint, one a base coat that will peek through, and one a top coat, that you will see the most of, and household glue. That's right, direct from your kid's art box.
Sand and prime your piece if necessary, then paint with your base coat. Remember, this will be the color the will just peek through, so it's best if it contrasts with the top coat. Let dry.
Now mix household glue with equal parts water, and brush onto your base coat. This can be done easiest with a foam brush. Allow the glue to dry until just tacky, about 30 minutes.
Now for the reaction part. Brush on your top coat directly over the glue coat. Don't brush over any one area more than once, you will ruin the crackle effect in that area. You should start seeing the crackling take place within a minute or so.
The size of the crackles has a lot to do with your technique in applying the top coat, so experiment a little first. Long, smooth strokes tend to produce larger more dramatic cracks than short strokes, and if you really want a subtle effect, try sponging or ragging on the final coat.
Allow to dry overnight. If you wish to further antique your work, simply dab or brush it with some wood stain, then wipe off. Repeat until you get the desired look.
You can seal furniture or accessories with polyurethane or clearcoat, or coat it with common furniture wax.
The author, Kathleen Wilson is the editor of The Budget Decorator, a free ezine and newsletter dedicated to the "budget impaired" home decorator. Visit http://www.thebudgetdecorator.com for more ideas and projects, to learn about her workshop, and to sign up for the newsletter.
Zazzle Custom Home Decorator Items

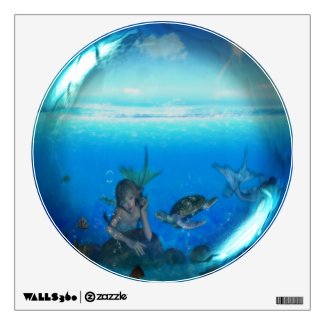
Mermaid & Turtle Glass Sphere Wall Decal by GroovyGraphics
Design your own custom wall stickers, too!
Related Pages
Home :-: Shop :-: Coloring :-: Clip Art :-: Printables
Search :-: Privacy :-: Site Index


